Search

Sass!

The Sweet and Savory Sisters!

food pics 010

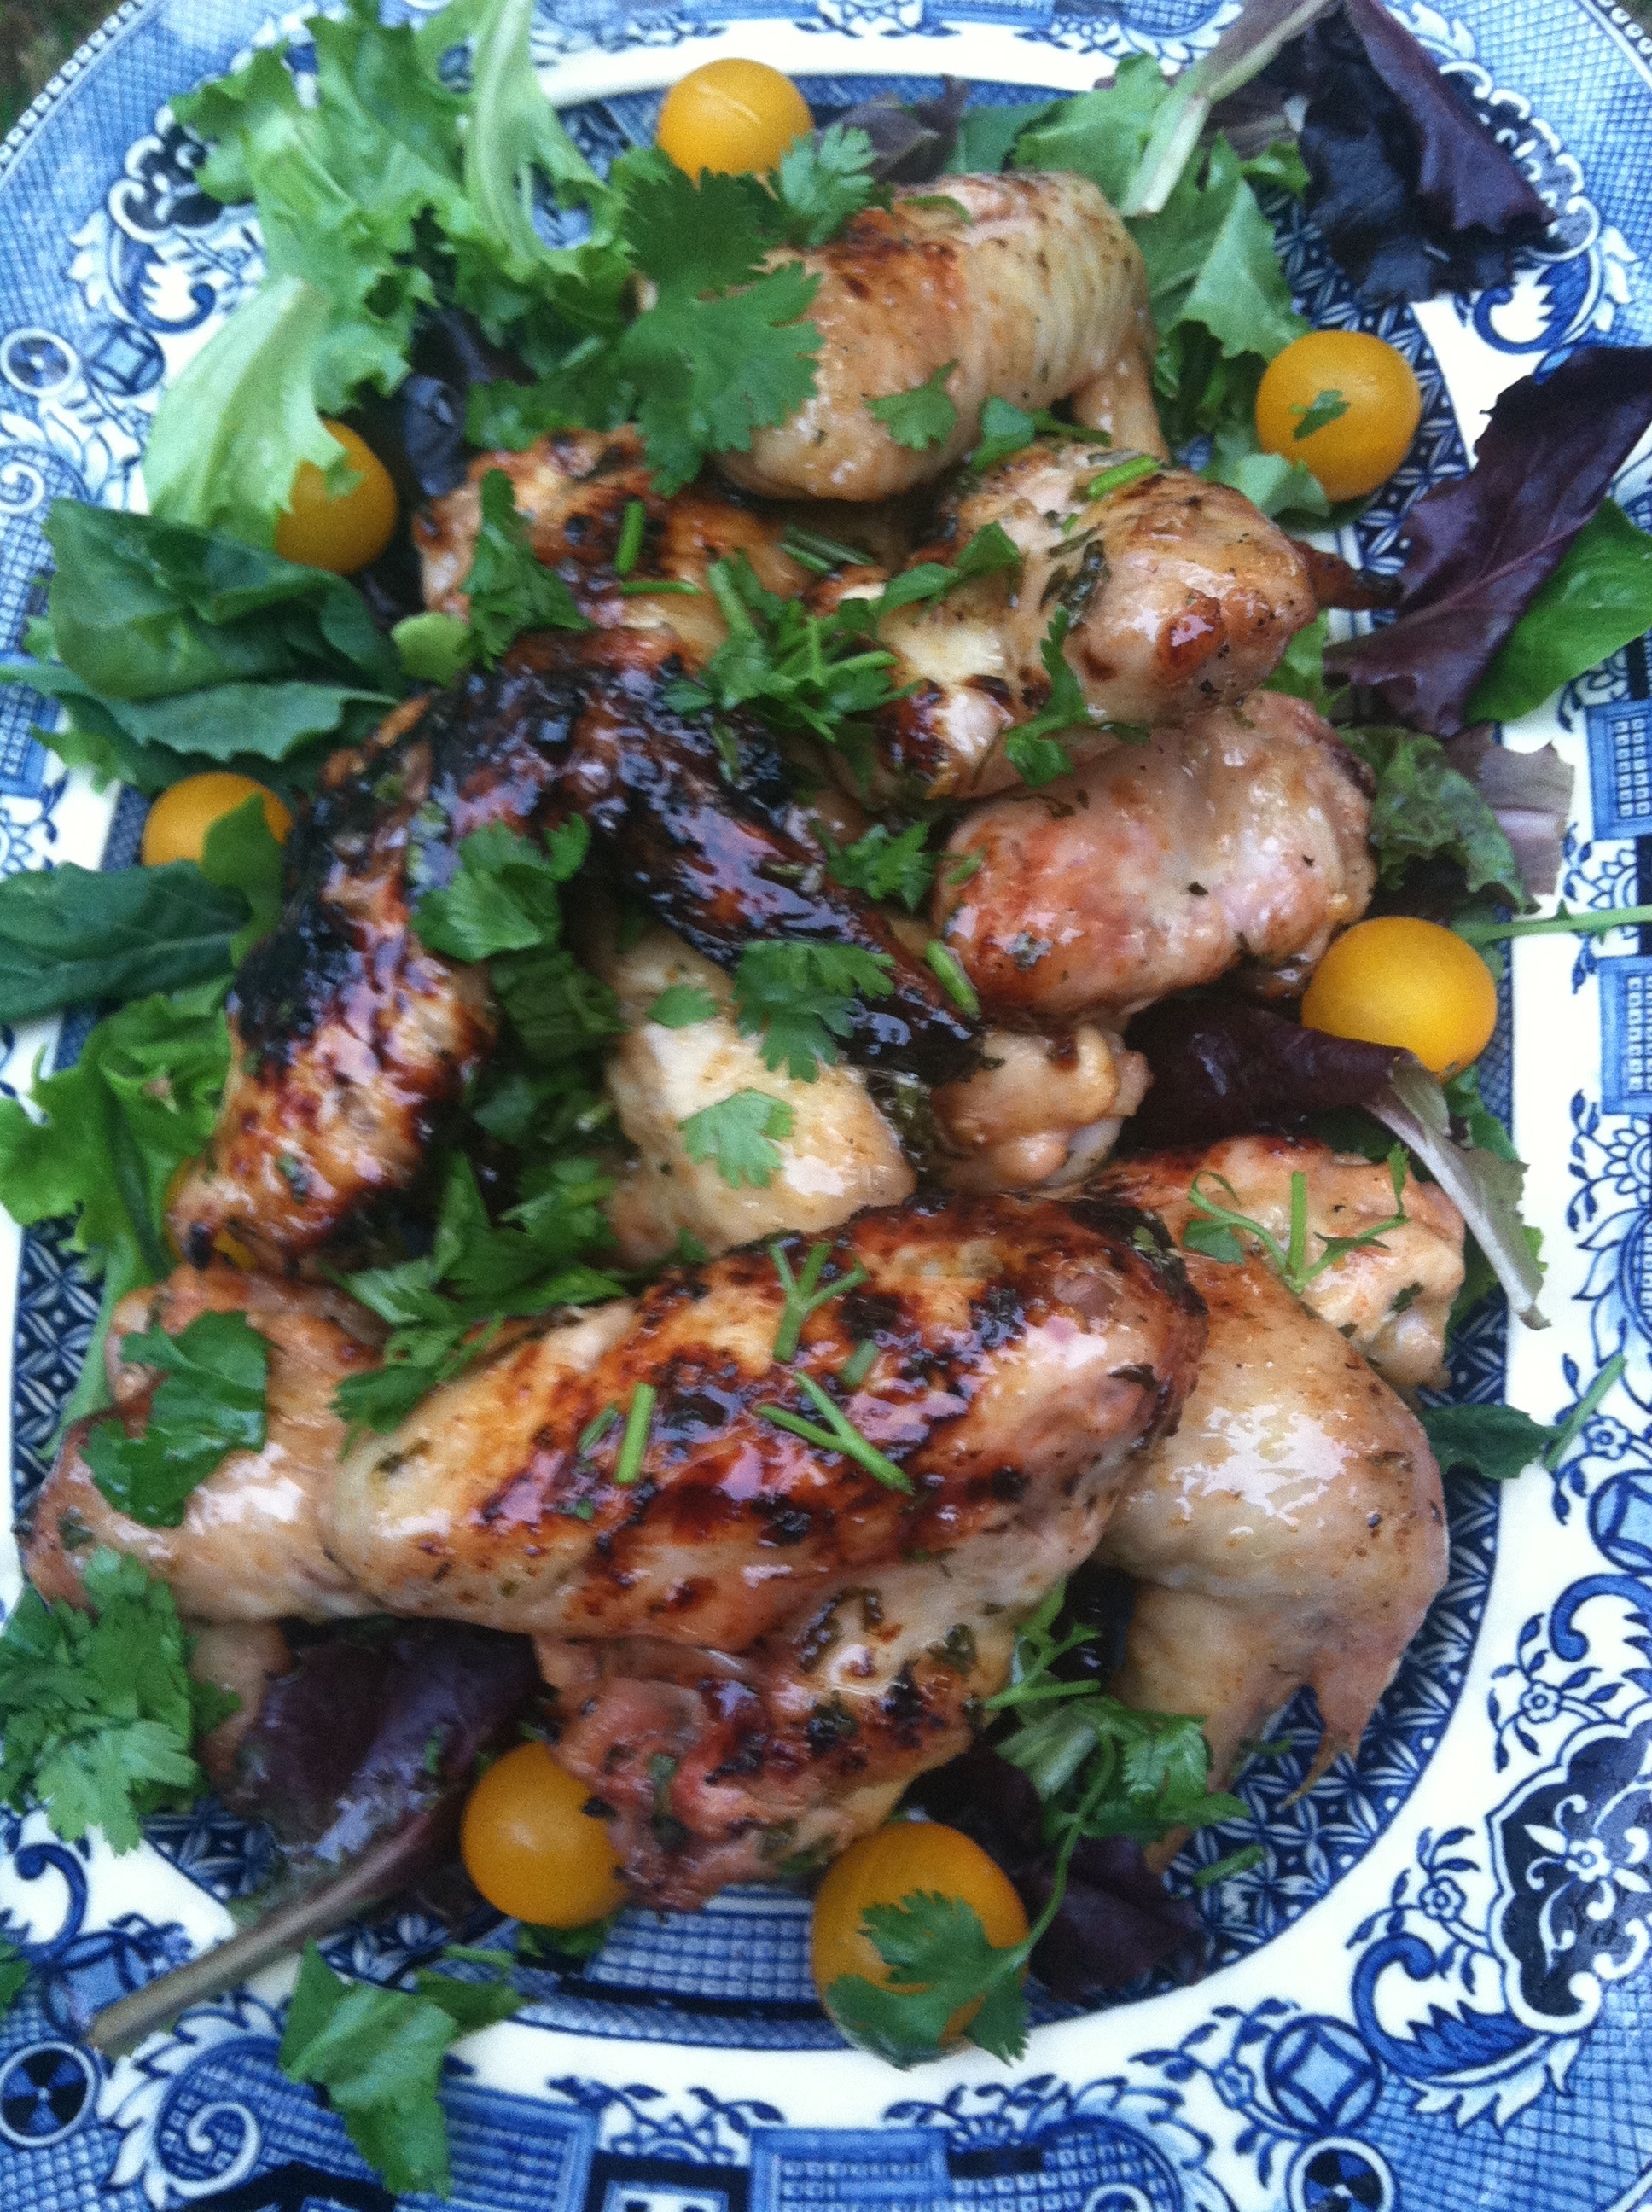
Amy: I love me some crudités, cause that means there is a variety of goodness on a platter. Sister and I worship us some variety on a platter! In case you didn’t know it, cause we didn’t until we looked it up, a crudités is a traditional French appetizer consisting of raw vegetables served with an oil base dip, but you can use whatever dip you want. So now that you got a vocabulary lesson go ahead and explore all the endless possibilities with creating a masterpiece.

The Sister’s Crudités

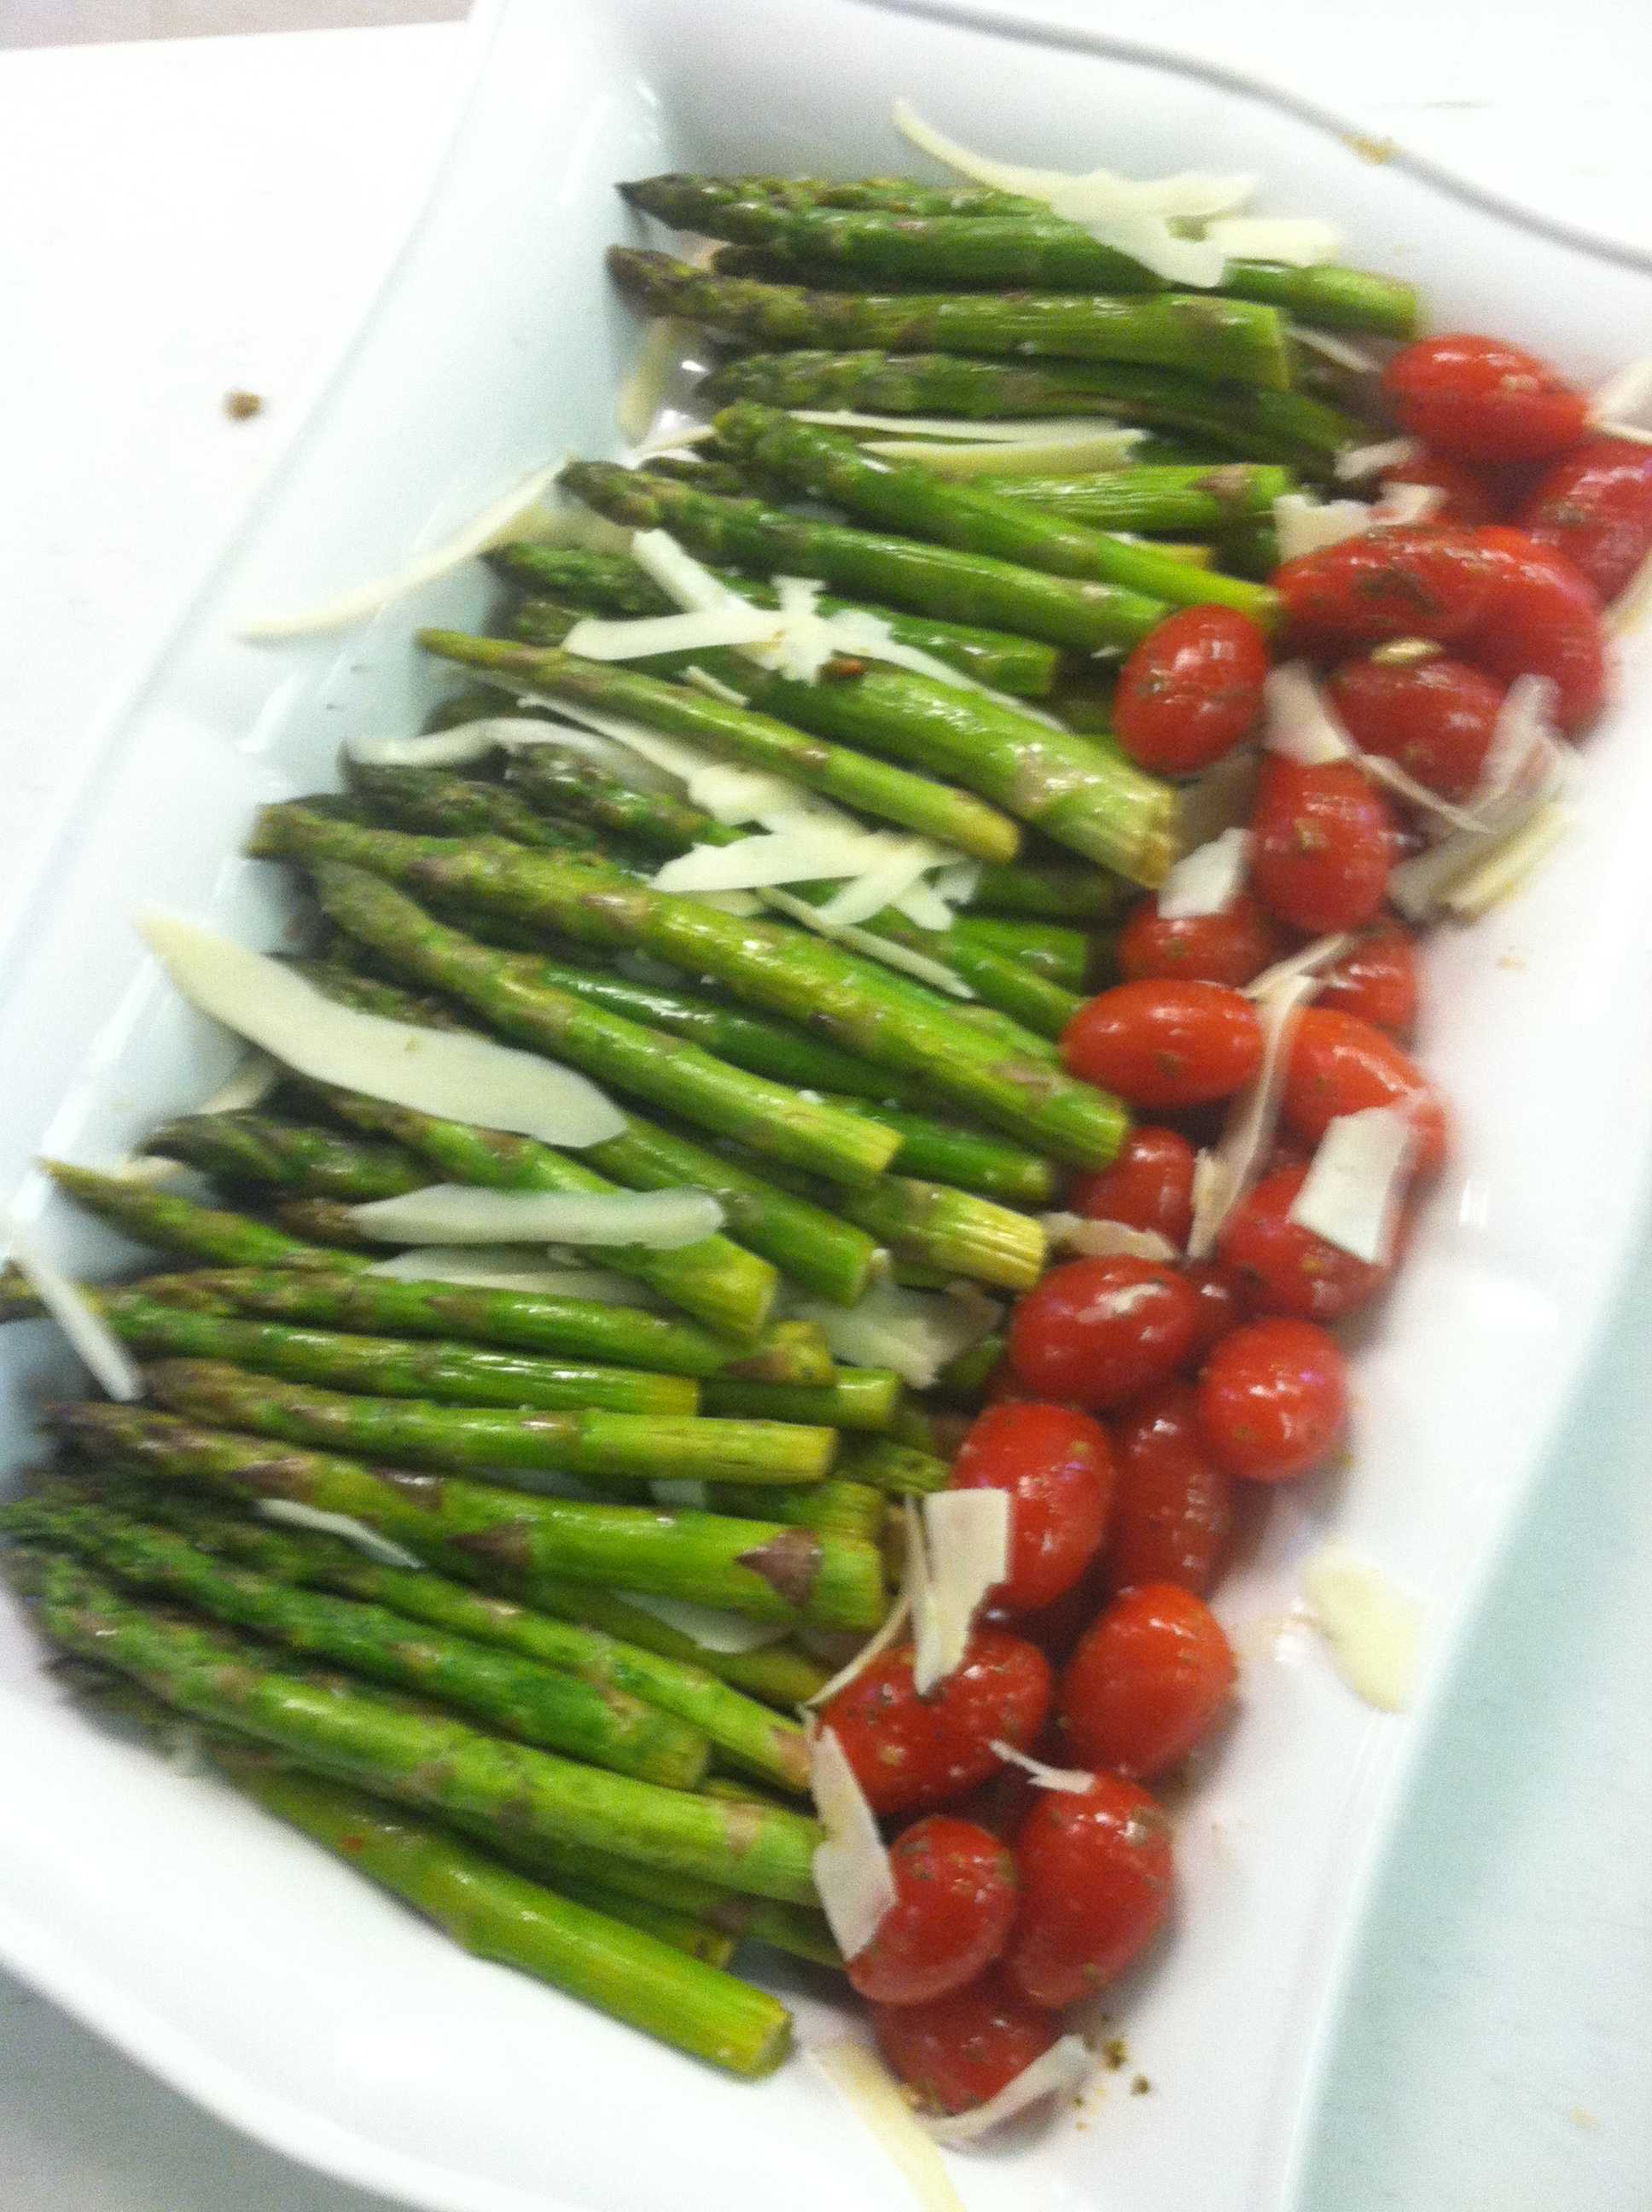
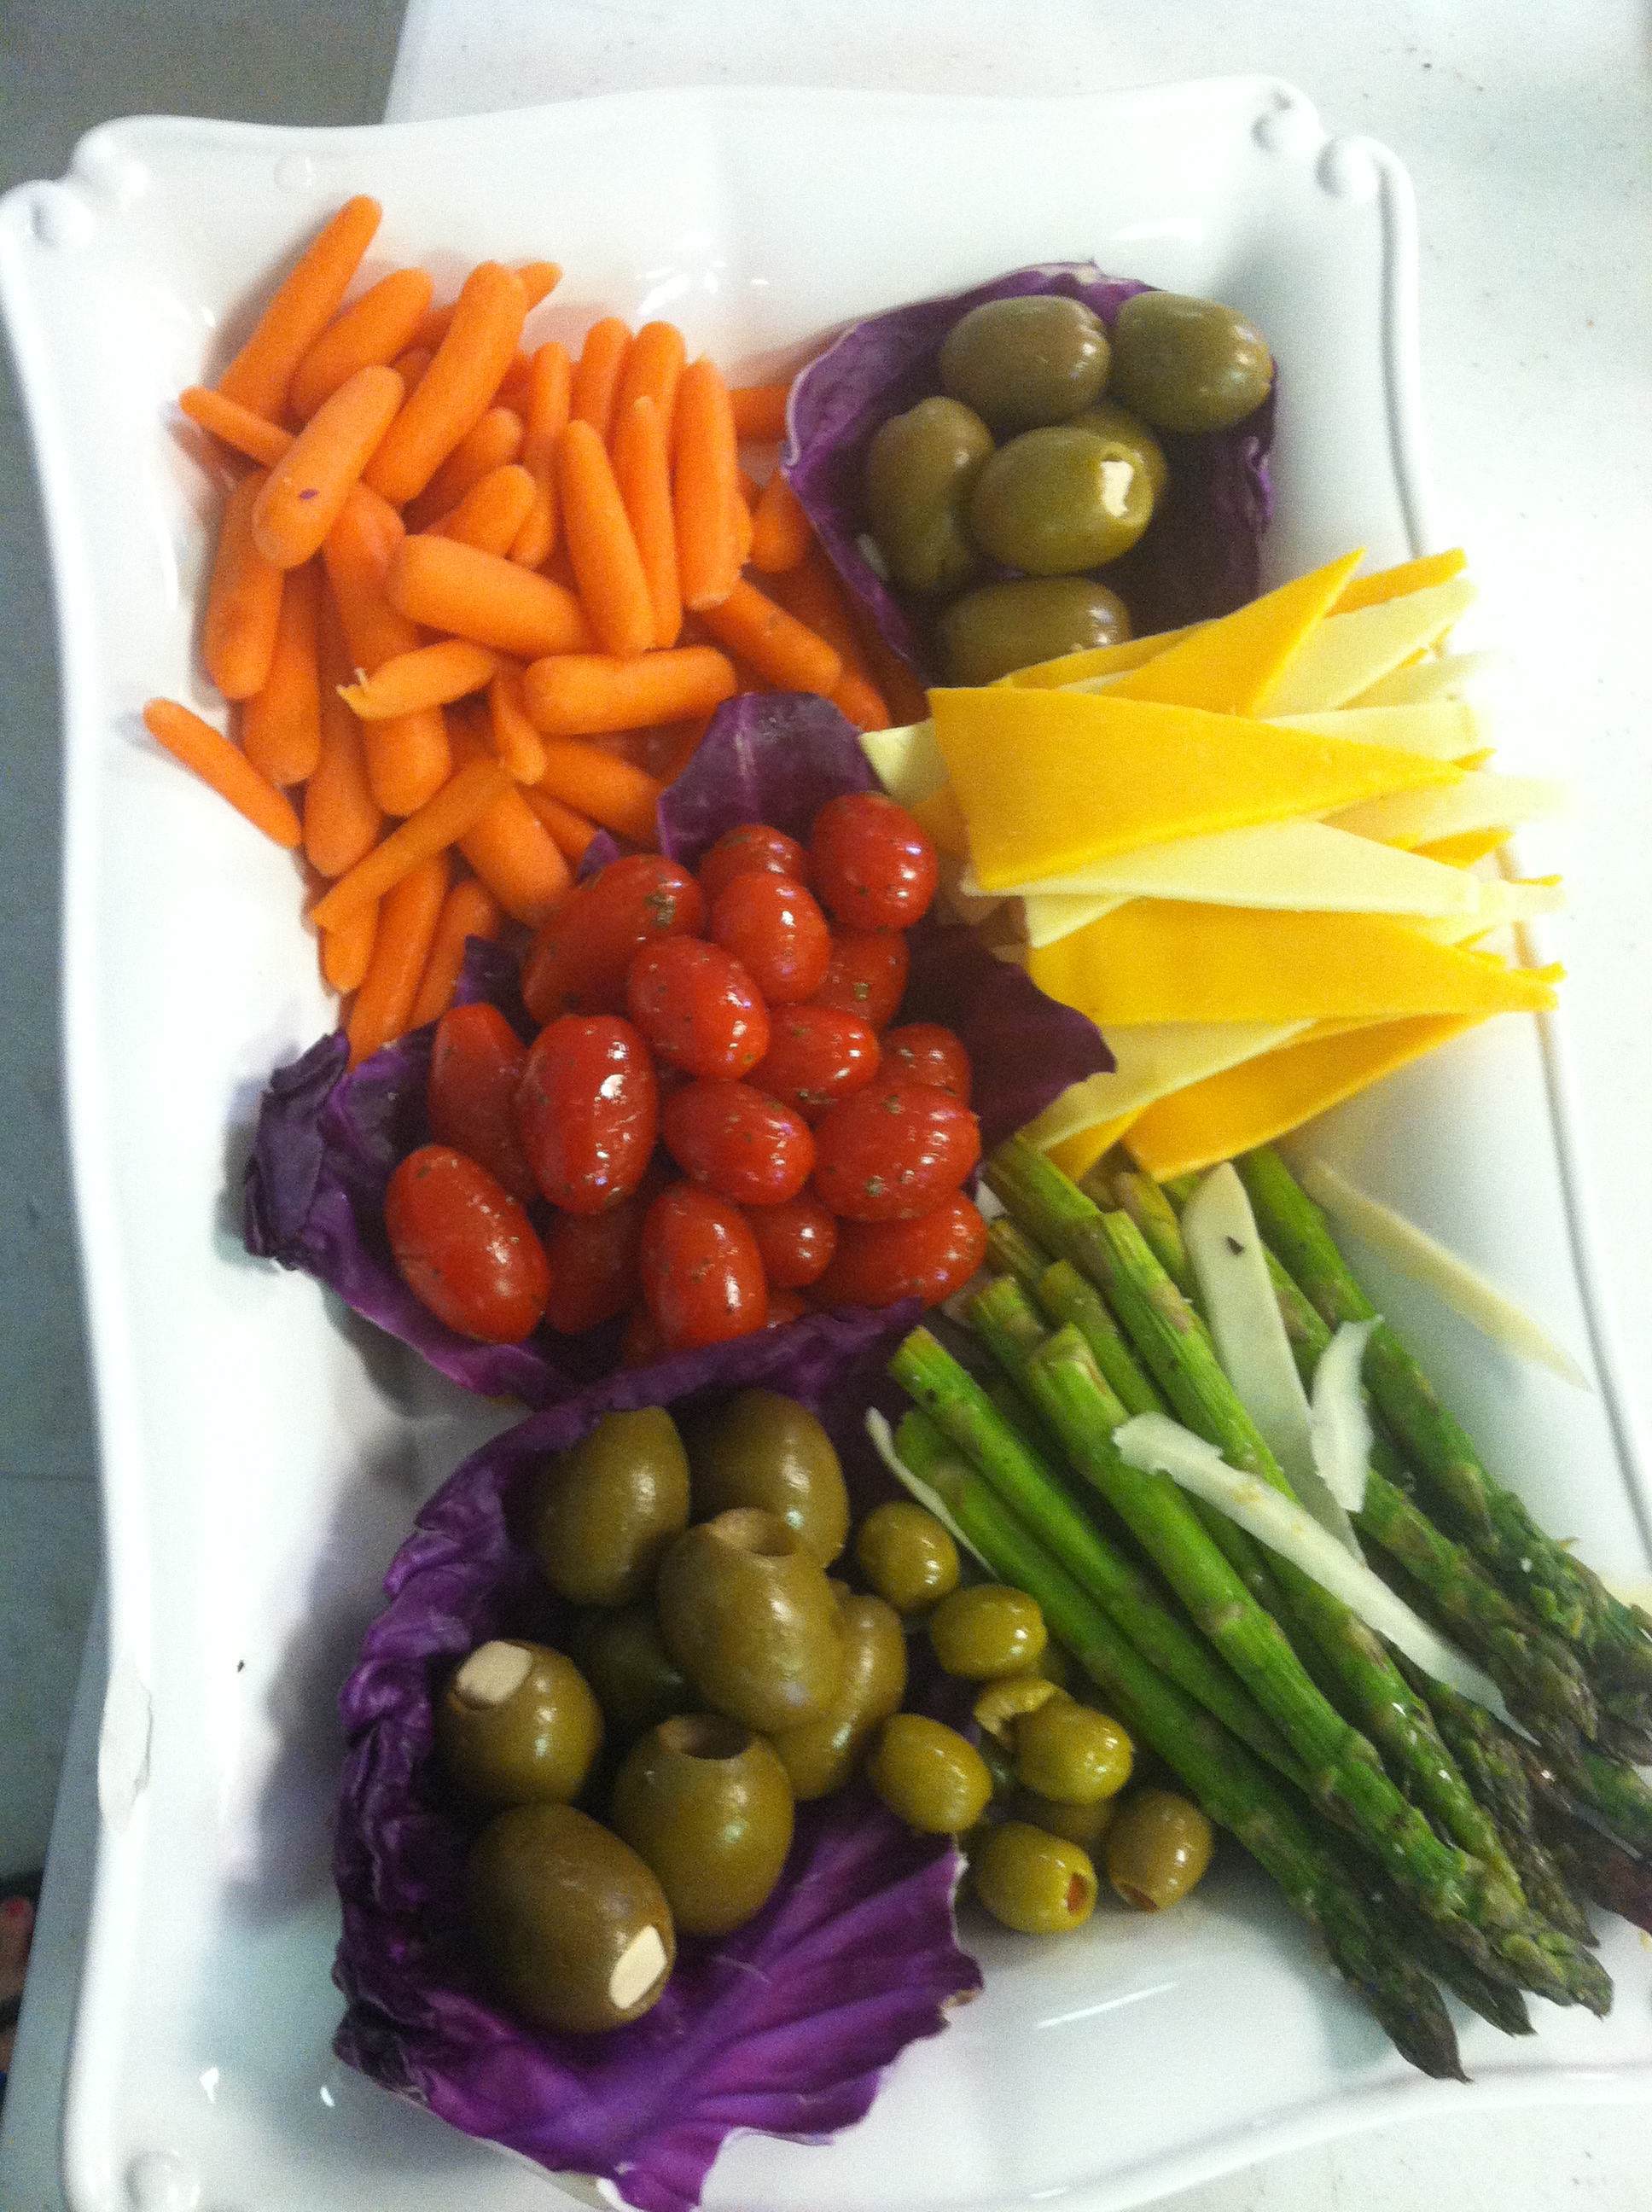
The presentation- It is all about the presentation, repeat, “It’s all about presentation”! Normally people frown upon seeing a raw vegetable tray sitting among so many other varieties of goodness, but if you do it right and give it some personality they will be skipping over to your stunning success. There can be so much done with a crudités. The choices are limitless. It is very important to have your vegetables on a nice-looking tray. We used an old windowpane to present ours on for a wedding and it looked fabulous. We like to add our sauces and dips in hallowed out vegetables, such as a purple cabbage. Remove the outer leaves and scoop out the core. You can use the outer leaves from the cabbage to decorate your platter. Bell peppers are also great to use for your dips. Add flowers or fresh herbs as garnish. We like to add a selection of cheese and crumble semi-soft cheese over the vegetables.

Our favorite items to put on our crudités are- marinated artichoke hearts, marinated asparagus, broccoli, green beans, snow peas, sugar snap peas, grape tomatoes, zucchini, red peppers, celery and olives.
food pics 007

The Sister’s Homemade Georgia Peach Ice Cream

ice creamSuzette: It’s time for a cool change when you are going through “the change”. I know, because I am experiencing it for myself and it is a bitch. It is hot as Hades during those hot summers in the South Georgia. When I am having one of those dreadful hot flashes, it is a necessity to get my hands on two items, ice cream and a fan. The fan can be on a stick (like they give you in the South at funerals) or an electric one. Take a minute out of your weekend and make you some homemade Georgia Peach ice cream. Amy and I promise you will feel like that “cool cat” you used to be when you were riding around town with your t-tops out of your car, hair feathered back and a comb sticking out of your back pocket! That is so super cool!

The Sister’s Homemade Georgia Peach Ice Cream

This is what you are going to need-

1 (14-ounce) can sweetened condensed milk
1 (5-ounce) can evaporated milk
¾ cups whole milk
½ cup half and half
6-8 peaches peeled, sliced
¾ cup sugar
3 tablespoons lemon juice
¼ teaspoon salt
1 teaspoon vanilla

Let’s get to churning baby-
Get you a large bowl out and combine the first 4 ingredients. Give it a good ole whisk. Next, get your blender or food processor out; blend those yummy South Georgia peaches, sugar, lemon juice, salt and vanilla. Blend until just smooth, but do not over blend. Now you are going to want to add that yummy peach mixture to the milk mixture. Pour the milk and peach mixture into a one quart ice cream maker and churn baby churn (follow the manufactures directions). Don’t be dumb, go on and get you some.

Better Butter Biscuits with Strawberry Jam

Amy- I saw a similar recipe to this and just knew I had to do our own recipe. Suz and I served these wonderful biscuits at a party and everyone just loved them. They are pretty darn easy and inexpensive to make. I love the flavors of the strawberries and lime; they work so well together. They are great right out of the oven or served with a dollop of ice-cream or homemade whipped cream,yum-yum.

food pics 141

What you need for the strawberry jam-

16 oz fresh strawberries, hulled and quartered
¼ cup sugar
1 lime, zested
1 lime, juiced

For the better buttered biscuits-

2 ½ cups Bisquick
¾ cup sugar
1 teaspoon lime zest
1 stick cold butter, cut into slivers
¾ cup buttermilk
3 tablespoons butter, melted
Sugar for sprinkling

Make the strawberry goodness-

Yum-my, I love some strawberry goodness. Alright, this is what you need to do, get you a medium heavy bottom sauce pan out, add your strawberries and sugar and give it a good ole stir. Turn your heat to medium high and stir occasionally for about 12-15 minutes, watching very closely. Don’t you be burning those strawberries. Remove from the heat, add your lime zest and lime juice, stir it up real good and let those babies cool.

For the better butter biscuits-
I get so darn tickled at the name, “better butter biscuits”. Some friends and I went through a drive through one morning before high school to get some breakfast. My friend, Guy Harris, asked me what he should order. I told him to get us 1 dozen of the “better butter biscuits”. He ordered them that way and the lady was like, “huh, I don’t know what you are talking about”. He just kept saying, “better butter biscuits; we want the better butter biscuits”. It was so funny and we have laughed about that for years. So to make these better butter biscuits, get you a large bowl out and add your Bisquick, sugar and lime zest. Using your clean fingers work the butter slivers into the Bisquick and sugar mixture. Add your buttermilk and mix until just combined. Flour you a surface, plop dough out and knead dough for a couple of minutes. I divide the dough into 2- 3 pieces because it makes it easier to work with. You can do it the way you want to. Roll dough about ½ inch thick. Use a 2 ½ inch biscuit cutter to cut out the biscuit rounds. Brush each biscuit with some better butter and sprinkle lightly with sugar. Use the back of a small spoon or your thumb and make a divot in each biscuit and then spoon strawberry mixture into each divot. Place on a greased cookie sheet and bake for 12-15 minutes or until golden brown and no longer doughy.

Vegetable Frittata

20130606-044313.jpg

This is a great recipe for breakfast or a weeknight dinner. It is very easy to make and easy clean-up. The recipe is so versatile. You can use your favorite veggies, add meat or omit veggies and just use meat.

What you need

8 oz sliced mushrooms
1/2 small red onion, diced
1 tablespoon butter
1 pound spinach leaves
Garlic salt, to taste
8 eggs
2 spring onion, diced
1/2 cup cheese, grated (your fav)
Salt & pepper, to taste

What to do-

Get a large oven safe, non stick pan heated over medium heat. Spray pan generously with cooking spray. Add your butter, mushrooms and onions and sauté until tender, about 8-10 minutes.

20130606-045212.jpg

Add your spinach and cook until spinach has wilted. Season with a little garlic salt. A little garlic salt goes a long way.

20130606-045335.jpg

In a medium size bowl combine eggs, spring onion and cheese. Season to taste with salt and pepper.

20130606-045625.jpg
Spread vegetables evenly and add your eggs. Let cook for about a minute or two. Using a spatula lift spinach mixture and let egg mixture flow. When the egg mixture is close to being set, pop in oven under the broiler and let continue cooking until eggs have set, just a few minutes.

20130606-050044.jpg
Slice and serve.

Crack Candy


The reason that we call this crack candy is because one piece aint gonna get it. You will slap your Mama and steel her pocketbook to get yourself another fix. You might want to double this recipe because if you don’t you might find yourself on the floor in the fetal position craving for more.

Crack Candy

Gather-
1 sleeve saltine crackers
2 sticks butter
1 cup brown sugar, packed
1 cup mini semi sweet morsels
1 cup mini milk chocolate morsels
1 cup Heath English Toffee Bits
1 cup walnuts, chopped fine

Make your crack by-
Spray a large cookie sheet with cooking spray (can be lined first). Place crackers on cookie sheet in a row. In a medium sauce pot, melt butter and stir brown sugar. Bring mixture to a boil and let boil for 3 minutes. Pour mixture over crackers and bake in a preheated 350 degree oven for 5 minutes. Remove from oven and turn oven off. Sprinkle chocolate chips, heath bar and nuts over crackers. Return to oven for and let chocolate melt, about 3-5 minutes. Cut into squares while warm.

The Queens Potatoes

20130530-052359.jpgThis is a fabulous recipe to have when guests are coming over. Everything can be done ahead of time and can be popped in the oven right before dinner is ready. This side dish makes for a wonderful presentation and is very yummy.

The Queens Potatoes

This is what you need
4 medium tomatoes
2 pounds potatoes, peeled and chopped
8 tablespoons butter
2 cloves garlic, minced
½ cup diced onion
1 egg, tempered (mixed with potatoes after mashed)
½ cup mayonnaise
Salt and Pepper
¼ cup grated parmesan cheese (or your favorite cheese)

Get it done-
Cut tomatoes in half and scoop out seeds and pulp, invert to drain.
Place potatoes in salted water and bring to a boil. Cook until tender, approximately 14 – 16 minutes.
Melt 8 tablespoons of butter in a skillet and sauté onions until they are translucent. Add garlic and continue cooking until garlic is fragrant.
When potatoes are ready, drain and return to pan, shake in a pan over medium heat until potatoes are dry. Mash potatoes and then add butter, onion mixture, tempered egg, mayonnaise and salt and pepper. Blot the inside of the tomatoes with a paper towel and salt and pepper inside of tomatoes. Pipe potatoes into tomatoes, place in lined broiling pan and bake in a preheat 425 degree oven for about 10 minutes. Add parmesan cheese and return to oven and bake for an additional 5-7 minutes.

Sacred Grits Casserole with Corn and Roasted Tomatoes

20130528-062123.jpg

Sacred Grits Casserole
We are going to get off the beaten path for this one folks. We have a passion for grits and nowadays you can just about find all kinds of different recipes for grits. Well, this recipe is nowhere near your ordinary Grits recipe, it’s sacred. One bite of this delicious creamy recipe and you will feel somewhat holy! You will defiantly want to take this dish to your next soiree and give your pals something to talk about. They can talk all about your lovely grits casserole instead of who is doing who!

Make it-
3 fresh cobs of corn
1 pint cherry tomatoes, sliced in half
1 cup grits and salt
2 cups heavy cream
2 cups chicken broth
4 ounces cream cheese
1 cup grated white cheddar cheese
Salt and pepper to taste
½ stick butter
Good quality olive oil, for garnish

Get it done-
Alright now let’s get this show on the road and make us some magic. First, toss your corn in the microwave and nuke for 7 minutes. Remove kernels from cob and set to the side. Next, preheat your oven to 400 degrees. Now get you a little bowl out and throw those cherry tomatoes in there that you already sliced in half, because that’s what we told you to do at the beginning. Now toss those jewels with some salt and pepper and a little olive oil, just enough oil to coat them, not bathe them. Now you are going to arrange the tomatoes cut side up on a sheet pan. You may want to line your cookie sheet with some aluminum foil, this makes for easy like Sunday morning clean up. You are going to need to cook these for about 30-45 minutes or until they are soft, shriveling and turning brown. At this time, prepare to get sanctified! You are going to concoct the best of the best mouthwatering grits. Bring your heavy cream and chicken broth to a gentle boil in a heavy sauce pan. Next, you will slowly add your grits and salt while whisking constantly. Turn your heat down to medium low. You will need to whisk your grits at first, making sure that they are not sticking to the bottom or to each other. You better watch that pot real good so you don’t scald these precious grits. Don’t even think about taken your eye off this pot and slipping off to take you a little nip before your soiree! Put a lid on the pot and cook until they are thick and creamy, for about 10-15 minutes or until desired consistency is reached. Make sure to stir throughout the cooking process. You can add you a little water, broth or milk if they get too thick. Season kindly with salt and pepper. Next, add your butter, you may add more if you are feeling frisky.
Now comes the goodness, stir in that good ole corn, cream cheese and white cheddar cheese. Pour these babies into a greased casserole dish and top this stunning success with the roasted tomatoes. Drizzle with a little olive oil and place it in the oven and cook for about 25 minutes. Just simply stick a fork in it, cause you are done!

Grilled Cajun Brussels Sprouts

20130528-055514.jpg

Amy-
Growing up mom made Brussels a lot and Suz and I hated them. We especially hated the smell of them. We called them poop balls because of the smell. I guess our taste buds have changed and we love them now. The Cajun sauce and the grilled flavor make these sprouts extra yummy.

Grilled Cajun Brussels Sprouts

What you need-
16 oz Brussels sprouts, ends removed and cleaned
3 tablespoons butter
1 tablespoon olive oil
3 cloves garlic, finely chopped
3 teaspoons hot sauce, or to taste
1 teaspoon rice vinegar
Cajun seasoning, to taste

Do this-
In a sauce pan heat butter and add olive oil, garlic, hot sauce and vinegar. Simmer for a few minutes and then season with the Cajun seasoning.
Throw Brussels into a large, microwave safe mixing bowl, add you 2 tablespoons of water and heat in the microwave on high for about 4 minutes. Drain water off of Brussels. Toss sprouts in 1/2 of the sauce and then put in aluminum foil pack and seal. Grill for about 10 minutes or until desired tenderness. Toss in remaining sauce.

Honey, Lime and Cilantro Wings

20130519-071608.jpg Amy- You know in a lot of families/relationships the men do all of the grilling and the women work on all of the fixins inside. I love to grill and Andy has no problem allowing me to be the grill master from time to time. I love to get outside, turn me some good tunes on, have me a big ole frosty mug of diet coke and get my grill on. It’s pretty exciting to me and I’m pretty darn good at grilling too. I get it honestly; our Daddy is the master of disaster on the grill. I’m not a huge fan of using the lighter fluid. I never seem to get enough or I get too much. When I was formulating this recipe, my fire went out and I had to add lighter fluid. Well guess what, I added a little too much and about caught myself on fire. It scared me to death but I managed to get the recipe completed. I am so glad I did because these are some of the best wings that I have ever flopped my lips over. All of these flavors are absolutely delicious together. Happy grilling folks and be super sonic careful when using the lighter fluid.

Honey, Lime and Cilantro Wings

Round up-

4 lbs chicken wings, fresh not frozen
Marinade-
3 limes (juiced)
¾ cup extra virgin olive oil
1/4 cup cilantro
½ tablespoon Kosher Salt
1 teaspoon sugar
1 teaspoon paprika
For the sauce-
½ cup honey
1 stick butter
4 tablespoons fresh lime juice
Zest from 2 limes
3 cloves garlic, minced
2 tablespoons cilantro, chopped
Salt and ground black pepper
Arugula or salad greens
Cherry tomatoes and additional cilantro (for garnish)


Do this-

Make your marinade by dumping all of the things that you needed in a Ziploc bag. Mush it around making sure everything is mixed up really good. Add your clean wings to the bag and give it a shake or two. Pop in fridge for several hours and let the marinade do its magic. Turn the bag over ever so often to make sure all of the wings are soaking up the marinade. Time to drill- Daddy always calls it drilling instead of grilling. Not sure why, but he does. Get you some good tunes on and an adult beverage or soda and let’s get the show on the road. Stack you about 3 ½ pounds of charcoal in a pyramid on one side of the grill. Since I almost caught myself on fire and have a hard time figuring out how much fluid to use, I did some research to find out how much lighter fluid you are suppose to use. According to the lighter fluid bottle (who knew there were directions on the back), you are supposed to use 1.6 ounces of fluid per 1 pound of charcoal. So, add you 5.6 ounces of fluid and fire it up dude. Let your charcoal burn for about 15 minutes. Spread charcoal on that one side of the grill and let it burn for another 5 minutes. Put your wings on the other side of the grill (not directly on the fire) and shut the grill for about 35 minutes. Don’t be lifting it to take you a look at the wings. Leave the grill closed; you want all of the heat to stay inside the grill. Now head inside and make your wing sauce by putting all of the ingredients in a sauce pan and heating it until butter and honey have come together as one. Use about ½ of the sauce to baste and put the rest to the side. Now, your 35 minutes are up and you can open the grill. Baste wings using a basting brush, flip the wings and baste the other side. Don’t be shy with the basting sauce. Close the lid and grill for an additional 35 minutes or until wings are done. Once the wings are done I like to baste them again and move them to the fire side of the grill. The basting sauce will drip down on the fire and cause the charcoal to spark up. I like to get the skin charred a little bit. Take your wings off and toss with the remaining sauce. Serve on a bed of arugula or salad greens and garnish with cherry tomatoes and fresh cilantro. I like to use arugula because the peppery flavor from the arugula works so well with the honey and lime sauce but you can use whatever you like or have. The heat from the wings will wilt the greens and make them so darn yummy.

20130519-071818.jpg

Blog at WordPress.com.

Up ↑